If you develop build tasks for Azure DevOps, I am sure one thing you miss is the ability to get a detailed error report when your task fails due to exceptions. Your tasks in a regular CI/CD pipeline would just fail due to various reasons - wrong inputs provided to the task, your logic not handling a customer-specific scenario or some really unknown reasons. So once you released your extension to the marketplace you only have to rely on your users to report any issues in your build/release tasks. In this post, we will see how we can use Sentry to report errors in our extensions.
First thing - create an account at sentry.io and then Add a new project. Ideally, you will create a new project for each application you would like to capture the events. For my example, I am creating one project for each of my extension.
For this extension, I am using NodeJS as language as I am building my extensions in typescript.

You will be presented with the information on how to configure Sentry in your application.
There are only 3 things you need to do to get the error reports from your tasks
- Install the nodejs package
- Add the init code of your project in each of your tasks
- Lastly, add the code to capture events.
1. Install the nodejs package into your application
We will install the sentry package using the following command.
$ npm install @sentry/[email protected]
2. Add initialization code
First, import the module into your file
import * as sentry from "@sentry/node";
Next step will be to add the initialization code to our application. This is identity our application. Sentry calls this DSN or Data Source Name.
sentry.init({ dsn: "https://<<your-unique-code>>@sentry.io/<<your-unique-id>>" });
3. Add the code to capture the exceptions
Finally, you need to add the code to capture the exceptions in your code. Again sentry module provides captureException() and I add it to my catch block as below.
try
{
// my code
}
catch (error) {
sentry.captureException(error);
tl.error(error);
tl.setResult(tl.TaskResult.Failed, error);
}
3.1 Add custom tags - Optional
Since my extension contains multiple build/release tasks I decided to add a custom tag called task with value as name of the task. This will allow me to search for exceptions originating from the different tasks.
sentry.configureScope((scope) => {
scope.setTag("task", "secrets-for-strings");
});
This will tag each event with the tag task and with value secret-for-strings. Thus allow you to filter events only with tag search-for-events. To do that, search using string task:secret-for-strings in the search bar. The results will be listed

3.2 Track errors per release - Optional
This is really handy. You can track exceptions in your task per release version of your task. Thus, helping you to track each error against the release. Just note that this value for release property is global so its best to prefix it with something specific to the project. For example for my extension I have it as
sentry.init({
release: "[email protected]"
})
Monitoring logs in sentry.io
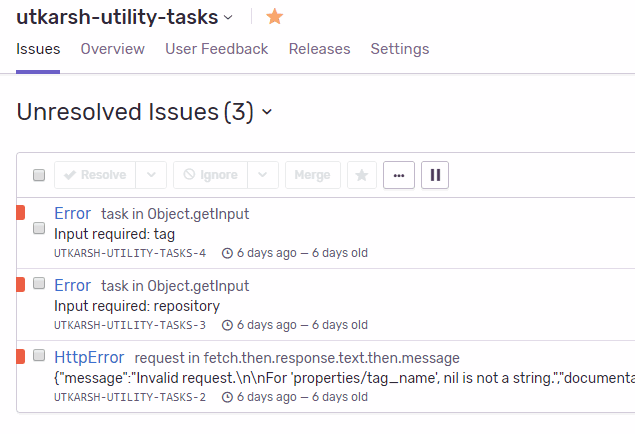
Finally you are ready to track exceptions in your tasks. Any failure in the task, within few seconds, the event will appear in your project dashboard.

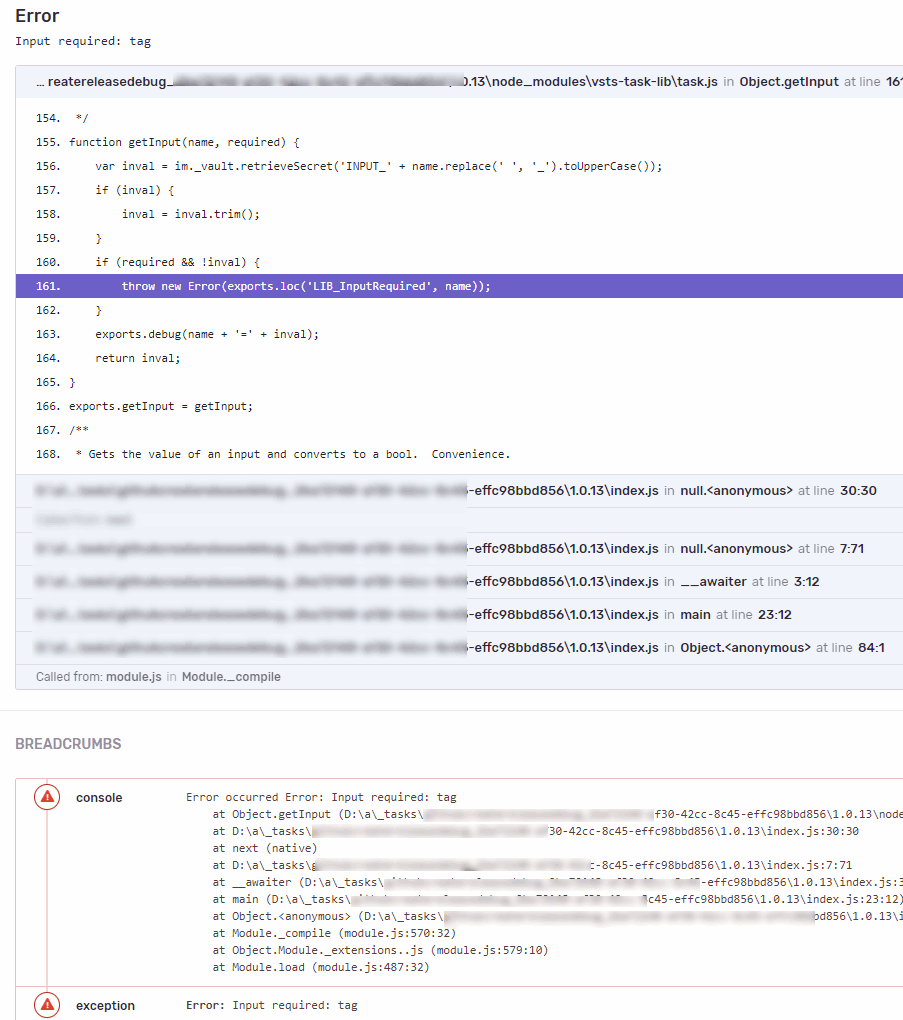
Click on any event, you will get the full stack trace of the exception.

Conclusion
BTW, there is also a Sentry extension in VS Marketplace which allows you to create new Azure DevOps work item directly from Sentry issues. If you are an enterprise, you can have end to end tracking - from sentry issues to commits which caused the issues, thus enabling full traceability.
That is it for this post. I hope you found this post useful - For any additional information start with getting started page.


