In this post we will see how you can configure WinRM (Windows Remote Management) service to work with HTTPS manually.
Configuring for HTTPS involves following steps.
- Check whether WinRM service is running
- Create HTTPS listener
- Add firewall exception
- Validate HTTPS listener
- Verify you can connect to the machine via HTTPS
For the demo purposes I have built a new VM using AzureDevTestLab. We will perform the above steps in this VM and enable it for HTTPS communication.
Check whether WinRM service is running
WinRM is installed by default in all supported Windows machines. Ensure that service is in running state in services.

Create HTTPS listener
By default when you run winrm quickconfig command WinRM is only configured for HTTP (port 5985). You can check already registered listeners by running following command.
WinRM e winrm/config/listener
You will see output like below.
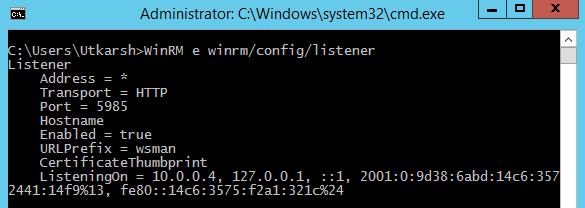
To enable HTTPS for WinRM, you need to open port 5986 and add HTTPS listener in the VM.
Before we start doing that, we will first need to create a self-signed certificate and get its thumbprint. To create a self signed certificate we can use either makecert command or a New-SelfSignedCertificate powershell commandlet. I am using powershell commandlet here. Open your powershell window in Adminstrator mode and run the below command.
New-SelfSignedCertificate -DnsName "<YOUR_DNS_NAME>" -CertStoreLocation Cert:\LocalMachine\My
This command will create a new self signed certificate and output the certificate thumbprint.

DNS name used in the above command is your machine hostname and for Aure portal VM’s you can get it from the portal from VM properties.
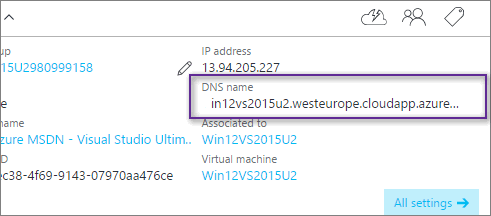
Copy the thumbprint to clipboard and run the following command. This command will register the HTTPS listener in WinRM
winrm create winrm/config/Listener?Address=*+Transport=HTTPS '@{Hostname="<YOUR_DNS_NAME>"; CertificateThumbprint="<COPIED_CERTIFICATE_THUMBPRINT>"}'
You will see output as below.

Add firewall exception
Via Firewall applet from Control Panel
- Open
Windows Firewallfrom Control Panel - Go to
Inbound Rulesthen clickNew Rule - This will open the wizard
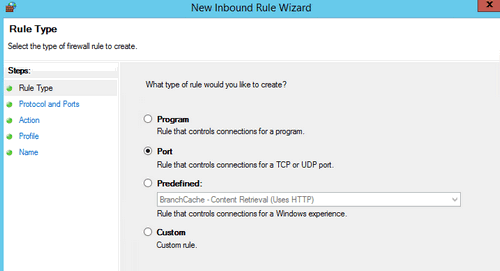
- Select Port and then TCP
- Enter port as
5986
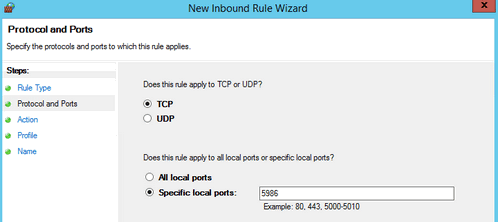
- In the next screens select
Allow the connection - In the profile page check all the checkboxes.
- Finally give a name to the rule.
Via command
You can also do the same operation and add firwall exception for port 5986 by running the following command in powershell console as Administrator.
# Add a new firewall rule
port=5986
netsh advfirewall firewall add rule name="Windows Remote Management (HTTPS-In)" dir=in action=allow protocol=TCP localport=$port

Validate HTTPS listener
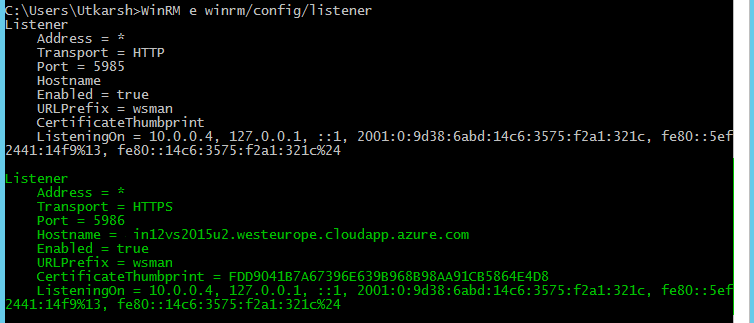
You can verify listener you added by running the same command you used above - WinRM e winrm/config/listener. This will show the new HTTP listener now along with previous HTTPS listener.
Verify you can connect to the machine via HTTPS
We have done with your WinRM configuration and now we need to verify we can connect to this VM using HTTPS.
Run the following commands in powershell window as Administrator
$hostName="<DNS_NAME>" # example: "mywindowsvm.westus.cloudapp.azure.com"
$winrmPort = "5986"
# Get the credentials of the machine
$cred = Get-Credential
# Connect to the machine
$soptions = New-PSSessionOption -SkipCACheck
Enter-PSSession -ComputerName $hostName -Port $winrmPort -Credential $cred -SessionOption $soptions -UseSSL
On entering the last command, you will be logged in to remote machine’s powershell session. As you can see in the screenshot below, you are connected and you can get the items from the remote virtual machine.

That is it then. You can read these other great blog posts on WinRM, AzureDevTestLab and DevOps.
- Deploy new VM in an existing AzureDevTestLab using VSTS
- Copy custom images (VHD) between AzureDevTestLabs
- Configure WinRm with ARM template using PowerShell artifact


