In this blogpost we’ll learn how to set up SonarQube with Visual Studio Team Services (VSTS) to perform codeanalysis on C# code using the MSBuild SonarQube runner developed jointly by Microsoft and SonarSource.
Infrastructure Setup
This is a single box set up of SonarQube on a Windows Server 2012 R2. In future post I’ll cover a more scaled out enterprise set up of SonarQube.
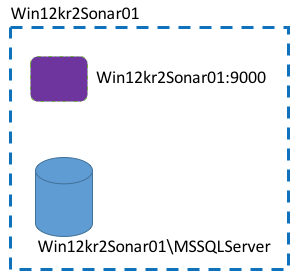
Pre-requisites
In order to set up SonarQube on a windows server backed by Sql server Windows Authentication the following pre-requisites are required…
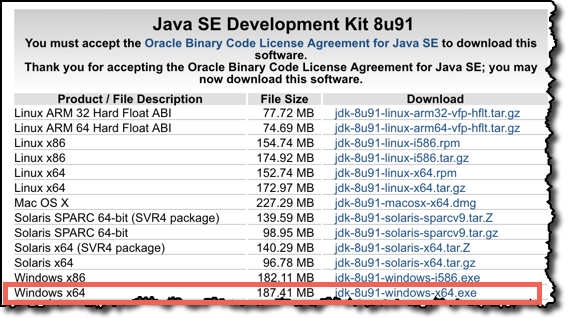
- Install Java SE: In order to run the web server, SonarQube requires Java SE. Download JavaSE from the oracle website http://www.oracle.com/technetwork/java/javase/downloads/jdk8-downloads-2133151.html. I am using version Java SE 8, for 64 bit OS download x64. Run the installation wizard and set up using the defaults.
- Download SonarQube binaries: Download the latest SonarQube bits from the SonarQube download page http://www.sonarqube.org/downloads/. In this blogpost I’ll be using SonarQube 5.4 released on Mar 9, 2016. I’ll refresh this blogpost if a new version of SonarQube requires changes to the install process.

- Install SQL Server 2014: SonarQube supports various database backend technologies. I’ll be using SQL Server 2014. SonarQube supports SQL Server 2008 and above including SQL Azure. Install SQL Server using the defaults in the wizard. I’ve named the default database instance MSSQLServer
SonarQube Pre-requisities validation & configuration
To avoid hours of troubleshooting later, it’s best to validate the install & configuration thus far.
-
JAVA SE: Validate the installation of JavaSE by running the following command on the commandline.

-
JAVA Environment Variable: Validate that the system environment variable has been updated with the java install location.

-
SQL Setup: Validate the SQL install. Open SSMS and connect to the sql server instance - .\MSSQLServer
- Validate the installed version of SQL Server
select @@version

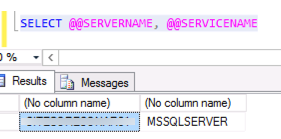
- Validate the SQL Instance & Service name
select @@servername, @@servicename
-
Database: Create a new database ‘sonar’ (all lowercase)
This database collation needs to be Case Sensitive (CS) & Accent Sensitive (AS) - choose Latin1_General_CS_AS.

The collation can be checked by running the following t-sql
SELECT CONVERT (varchar, SERVERPROPERTY('collation'));

-
SonarQube Service User: Create a new windows user ‘SonarUser’. Give this user approprite permissions to the machine. Set this user up for access in the newly created database instance. Run the following command to check the permissions this user has in the database instance. Create a login for this user and permission this user with appropriate permission on the newly created sonar database to be able to create the schema.
-
Static Port: In the default configuration of SQL Server, Dynamic port are enabled. SonarQube expects a static port to route the requests. Log into SQL Server configuration manager and follow the instructions here to enable the TCP/IP and disable dynamic ports. https://msdn.microsoft.com/en-GB/library/ms177440.aspx
At this point we have all the pre-requisites installed & successfully configured. If any of the configuration validations have failed try restarting the machine and running the validations again…
Run SonarQube without installation
-
Navigate to the earlier download location of SonarQube. Right click the zip file and choose unblock.
-
Unzip the file and copy the binaries to the folder C:\SonarQube\
-
Open the SonarQube properties file sonar.properties from the following location C:\SonarQube\sonarqube-5.4\conf.
-
In the sonar.properties file look for ‘#—– Microsoft SQLServer 2008/2012/2014 and SQL Azure’. This needs to have the connection string for the sql server database you intend to use.
-
Update the section by adding the connection string of the database
sonar.jdbc.url=jdbc:sqlserver://localhost;databaseName=sonar;integratedSecurity=true

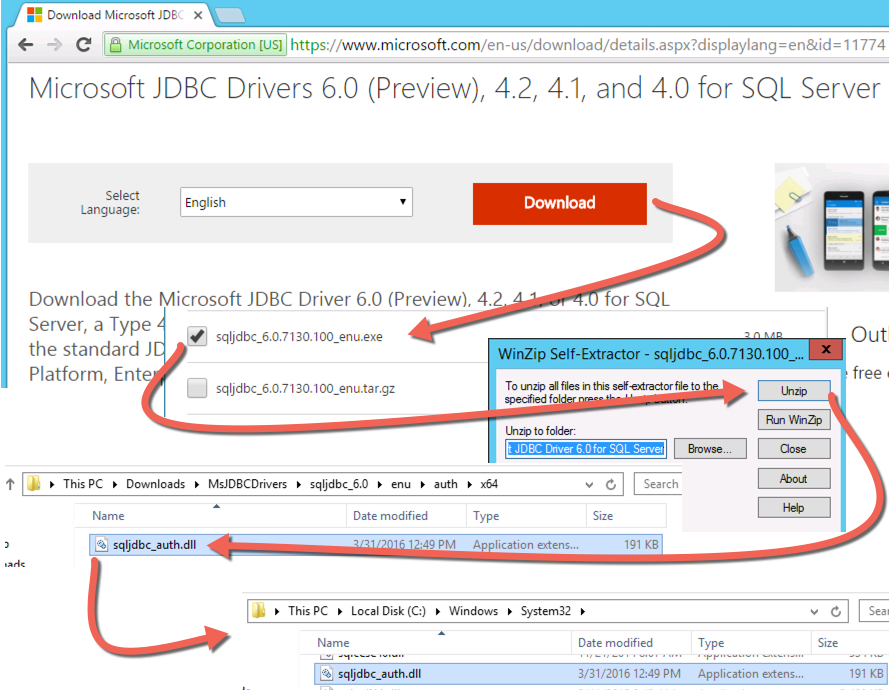
- For Integrated Security to work, you have to download the Microsoft SQL JDBC driver package from http://www.microsoft.com/en-us/download/details.aspx?displaylang=en&id=11774 and copy sqljdbc_auth.dll to your system32 folder.
-
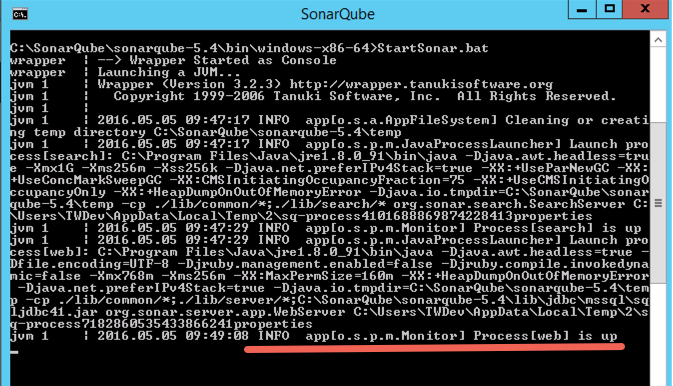
Launch a command prompt as administrator. Navigate to C:\SonarQube\sonarqube-5.4\bin\windows-x86-64 and run the below listed command.
-
At this point you should see the SonarQube running up in a local webserver mode. Open a browser and navigate to http://localhost:9000. Since this is the first time, SonarQube will deploy the schema to the sonar database.
SonarQube uses 9000 as the default port, you can change this to another port from the sonar.properties file.
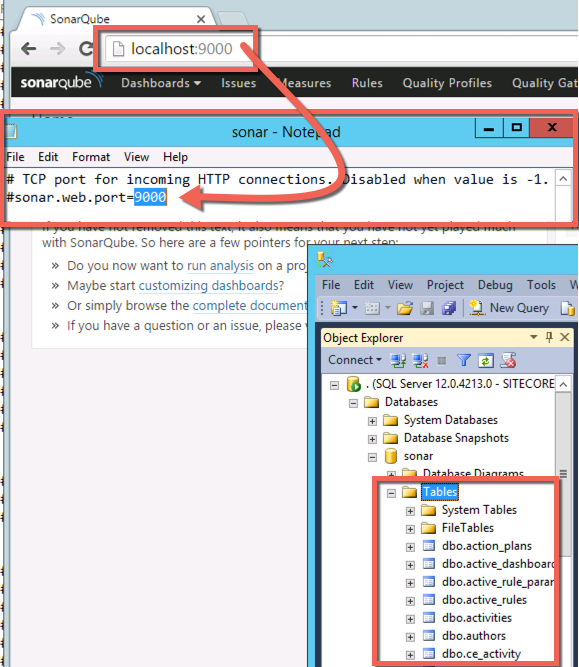
Remember to look into the log file located at C:\SonarQube\sonarqube-5.4\logs if you run into any exceptions. The error messages are quite well documented.
If you accidently left the database collation to case insensitive you are bound to hit some exceptions…
If the database has set up with case insensitive or there are issues with the user permissions expect to see exceptions. The best way to get to the bottom of the issue is to look at the log file available here… C:\SonarQube\sonarqube-5.4\logs. I have documented some of the common traps and resolutions here http://visualstudiogeeks.com/blog/sonarqube/devops/Configure-TFS2015-with-SonarQube-using-BuildTask-to-Track-Technical-Debt
SonarQube C# Plugin & MSBuild Runner
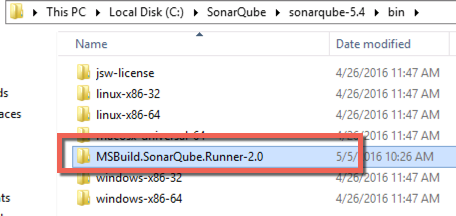
Download the SonarQube scanner for MSBuild 2.0 from the SonarQube website here http://docs.sonarqube.org/display/SCAN/Analyzing+with+SonarQube+Scanner+for+MSBuild

Unblock the zip file and copy the folder to C:\SonarQube\sonarqube-5.4\bin
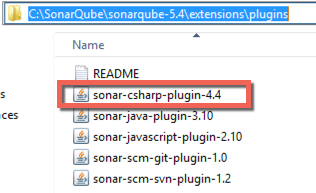
The SonarQube C# Plugin ships out of the box with SonarQube now, it does not need to be downloaded seperately. You’ll see the SonarQube C# Plugin available inside C:\SonarQube\sonarqube-5.4\extensions\plugins.
You’ll need to restart the cmd session for the SonarQube MSBuild 2.0 Scanner to be included. Run the startsonar command again to launch sonarQube in command line, navigate to the localhost:9000 in a browser to ensure that you can still see the sonarQube website. With everything working, close the commandline session. In the next section we’ll learn how to set up SonarQube as a windows service.
Install SonarQube and run as a service
In the last section by running SonarQube in commandline we have proven that all required configuration, frameworks and permissions are correct. In this section we’ll install SonarQube as a windows service.
Open up a command line as an administrator and navigate to the folder C:\SonarQube\sonarqube-5.4\bin\windows-x86-64. Invoke InstallNTService.bat. This will install SonarQube as a service.

In run prompt type services.msc and search for SonarQube service. Change the service logon user account to SonarUser. Start the service and refresh the services console after a few seconds to ensure that the service hasn’t failed. If the service has failed to start look in the log file to see the reason for the failure.

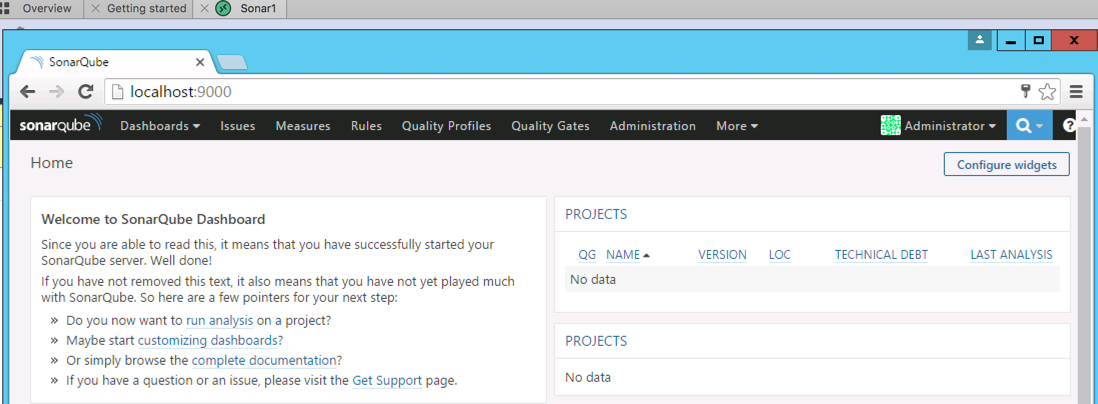
Now open up an instance of the browser and navigate to localhost:9000 to see the SonarQube website being returned from the process running as a windows service.
You can log in to the SonarQube website by using the default account admin // admin.
If you have run into some issues, I recommend looking at this blog post for common problems and solutions during the SonarQube set up. https://www.visualstudiogeeks.com/blog/sonarqube/devops/Configure-TFS2015-with-SonarQube-using-BuildTask-to-Track-Technical-Debt
Leave a comment if you have some feedabck about this post…
In the next blog post we’ll look at how to run sonarQube analysis from VSTS Build Pipeline.
Tarun


