With the flexibility in branching, it’s very easy to create a branch per feature. Sometimes I notice that people lack the same enthusiasm when it comes to creating build pipelines for these new branches. The downside of course is the more build definitions you create, the more administration overhead in keeping them all up to date as you make changes to your build pipeline. Wouldn’t it be great if you could just use one build definition to build all branches? In this blogpost I’ll walk you through a trick to use just one build definition to build all branches in your repository…
One build to rule them all!

For the purposes of this walkthrough let’s assume you have the following branches
- master main line for production
- develop integration for all features
- feature/myfeature1 feature development branch
Let’s see first how you can set up one build definition to trigger for all of these branches…
- Let’s start off by creating a new build, choose an empty process

- Call the build
OneBuildForAllBranchesand select a build pipeline, now navigate to the triggers section in the build and set theTriggerasContinuous Integration. Click the branch filter drop down and in the search box type*and press enter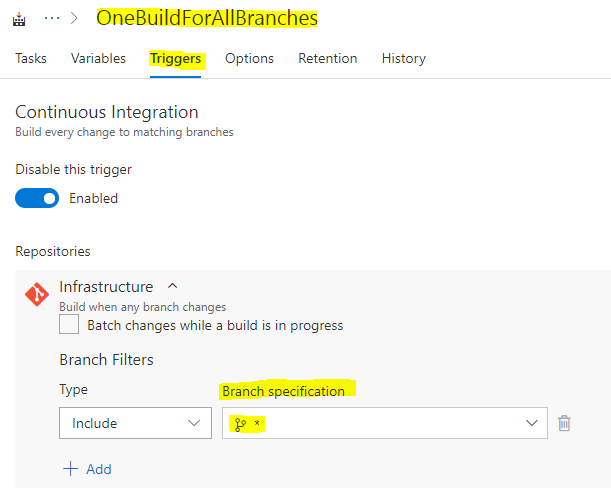
The build definition is now set up to trigger itself for changes in any branch in your repository. You could optionally reduce the filter scope by using specifying the branch filters to be excluded from the * all branch setup.
- To test this is working, you can make changes in any of these branches and you’ll see the build executes just fine…
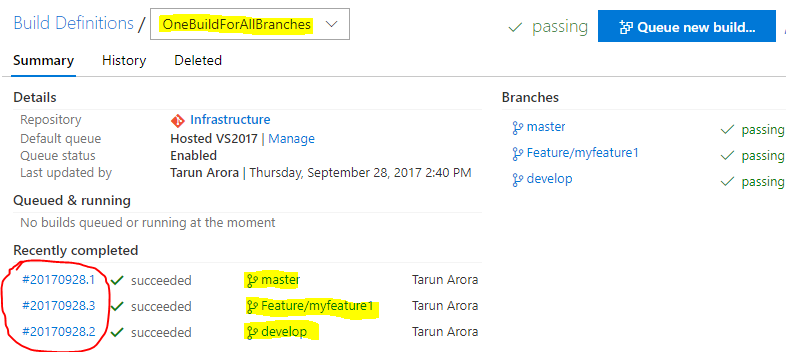
O wait! That’s a problem, I want to now identify the build by the branch it was executed for, otherwise I might accidently deploy my feature branch into production directly…
How to reflect branch quality in build name?
- In your build pipeline add a
PowerShelltask and copy the below shared code snippet…
write-host $env:BUILD_SOURCEBRANCHNAME

if ($env:BUILD_SOURCEBRANCHNAME -eq "Develop"){
     Write-Output ("##vso[build.updatebuildnumber]" + $env:BUILD_BUILDNUMBER+"-beta")
      write-host "setting version as -beta"
}
else
{
      if ($env:BUILD_SOURCEBRANCHNAME -ne "master"){
           Write-Output ("##vso[build.updatebuildnumber]" + $env:BUILD_BUILDNUMBER+"-alpha")
           write-host "setting version as -alpha"
       }
}
- In the PowerShell script above, I am simply using the predefined variables and prefixing the name of the build
betaoralphadepending on which branch the build is being created from. Now if you run the builds for all the branches you’ll see the quality reflected in it’s name…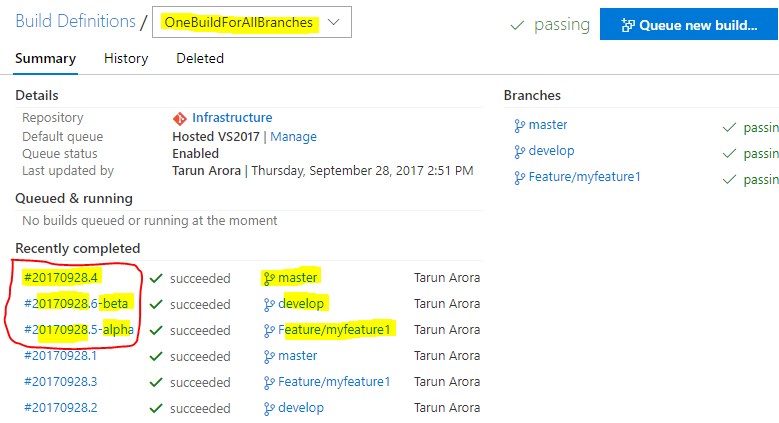
Ok cool! Now you are probably thinking, how can I stop my alpha build from accidently rolling out into the production environment?
How to filter branchs in environments in release pipeline?
-
Start off by creating a release pipeline and link it to your build pipeline. Create three environments, for example
DevTest,PreProdandProd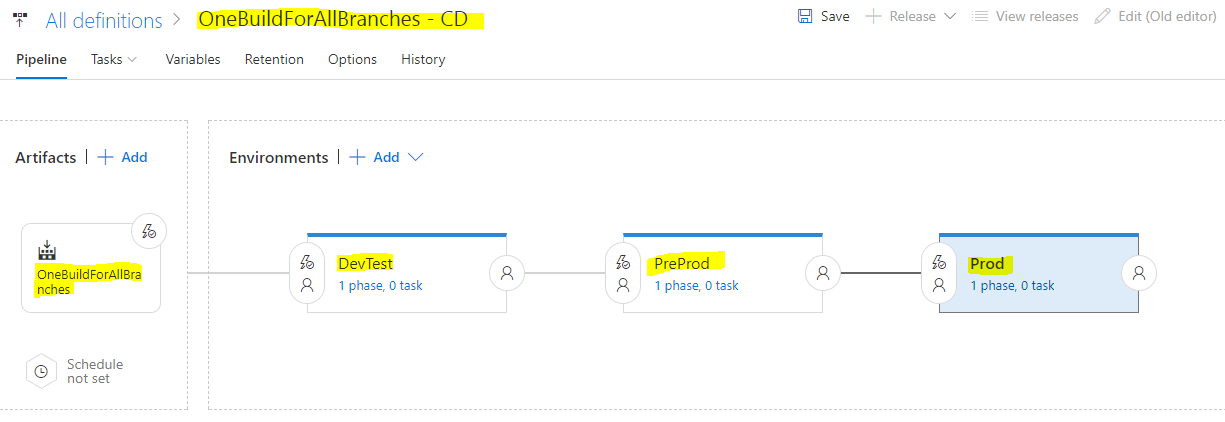
-
For the pre-prod environment, click on the
Pre-deployment Conditionicon and selectArtifact filters. This setting would block theFeature\*branches from being released into the Pre-Prod environment.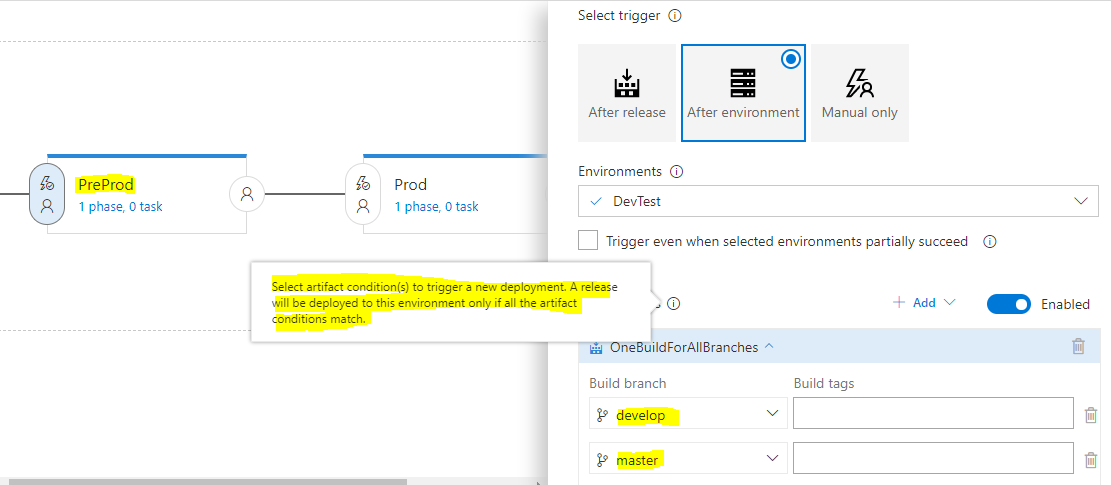
-
For the Prod environment, click on the
Pre-deployment Conditionicon and selectArtifact filters. This setting would block all branches exceptmasterfrom being released into the Prod environment.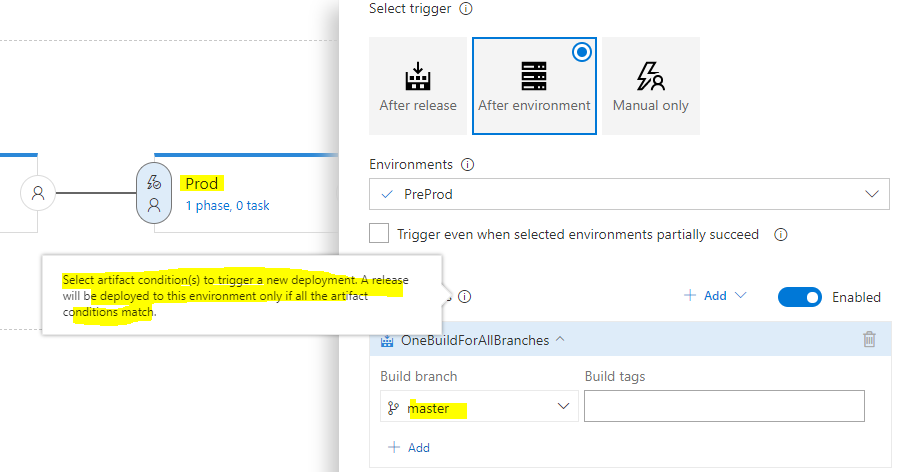
Summary
In this blogpost we saw how easy it is customize the build name by using the name of the branch it was triggered from and then how to set up the release pipeline to filter out specific artifacts from being released into specific environments. Hope you found this useful…
Tarun


